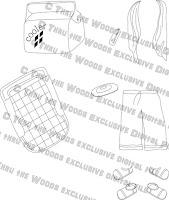
Sunday, October 18, 2015

Mummy In Search Of CANDY!


Here is that rascal - Charlie.  He has gotten into the seam binding and made himself into a Mummy for Halloween. 

The seam binding was smudged with some brown ink. 

 The background paper is by Authentique.  The stickers are from EK Sucess (not sure what to do with the frightened Mickey Mouse). 

 The candy bucket is by Stampers Anonymous, from Tim Holtz's "Crazy Things" set.  Charlie and all his friends can be purchased online @ http://cthruthewoods.com/
Please leave a comment and let us know who your favorite "Woods" boy is!

Monday, October 12, 2015

Brother


Hi Everyone, This is a card I made 
called Brother using C Thru the Woods digi
stamp called Timmy, could be purchase here.


To make this card:
1) I printed the digi stamp on to a photo paper to the size of the card you wish to use,
2) Then cut them out and I colored them with Stampin up watercolor in Grey, Navy and Turquoise,
3) The base card I stamped it randomly with a chevron stamp with brown inkpad,
4) I stamped randomly with scripted stamp with Turquoise inkpad,
5) I dust the edge of card using a sponge with light brown, and randomly with yellow ink
6) I then added a paper doily off center of the card, then I double diagonally line a blue white black washi tape on the corner of the card 
7) then pop dotted Timmy onto the card and a wooden brother sentiment then added couple flowers.

Hope you guys enjoy this card. Have a beautiful day! xoxoxo Angelica


Sunday, September 20, 2015

Timmy Heads Off To School


My cute little grandson headed off to Kindergarten this month.
To commemorate this event, Timmy put some shoes on
and tried to look like Jayden.  I trimmed Tim's hair up a bit
in an effort to mimic Jaydens.


Then I wanted to make the shirts match a bit so I stamped one shirt,
then cut a second one behind it.
This gave me a plain shirt with no ink on it. By cutting a slit down the chest
a bit, I was able to turn the "collar" down so it looked a bit more like Jaydens.
I also cut it a bit longer as he is short and stocky, so his shirts are always 
a little long.


I also made a pair of sneakers to cover up those bare toes.

Timmy can be purchased at
http://cthruthewoodsclearstamps.tictail.com/

Thanks for stopping by,
please leave a comment and let Charlene know that you love her awesome stamps.

Wednesday, September 9, 2015

Jeremiah's Birthday

Happy Wednesday!
It's Judy here with a birthday card I created
with the Jeremiah stamp.


I made this card for my son and since he's a really big movie fan
I decided to go with a movie theme.
Jeremiah was stamped on white card stock and
colored with Spectrum Noir markers. I fashioned his
muscle shirt into a short sleeved shirt.
He was then fussy cut.
The card base is 8 1/2"  x 5 1/2".
I popped Jeremiah on top of 2 layered rectangular panels.
The Recollections stickers were added on the right side
and there you have it. A pretty quick and easy birthday card.

You can find Jeremiah and all the other guy stamps HERE.
I hope you'll check them out!

Until next time, Happy Crafting!

Tuesday, September 8, 2015

Mark the Military Man Scrapbook Pages Contest


Mark the Military Man Scrapbook Pages

by Holly Ann Bray Designs

http://cthruthewoodsclearstamps.tictail.com/product/mark-large-stamp-set


CONTEST: Please like Charlene Woods C Thru the Woods Blog and comment on this post for a chance to win this 2 page layout. I will mail out to one lucky winner!!!!!

My two page scrapbook page I wanted to highlight Charlene Wood's clear acrylic stamp, Mark the Military Man. I went with military paper by Karen Foster feeling his Army uniform matched really well with the colors. I also chose her Legacy of Honor card stock stickers which were matted and pop-dotted in certain areas. Next, I stamped Mark on  Copic suitable paper and proceeded to use Copic Markers to color his face and hair. I stamped and fussy cut his boots, cap, badges and uniform. I really enjoyed making this 2 page lay-out and hope someone will  enjoy adding their own Military Man.


Tuesday, September 1, 2015

Day of the Dead Doll Inspired by Digital Angel Wings


Day of the Dead Card

by Holly Ann Bray Designs


I was trying to utilize the digital image, Angel Wings by Charlene Woods in a new and unexpected way.  I printed several of the Wings images to color, cut and create the eyes, angel and Mexican floral wreath surrounding the skull. The huge, decorated eyes which were added to the skull were inspired by the round motifs on the bottom of the Angel's robe. I looked at Day of the Dead make-up posts on Pinterest to choose my Copic marker colors. The gems were added for dimension and sparkle. A Happy Day of the Dead sentiment and poem completed the pre-made Doodlebug Design
card.    

Sunday, August 30, 2015

Alter Egos

Donna here to share how your stamps have alter egos.


Jeremiah has had a great summer, but is ready to head back to college.
I wanted to modify him a bit.
So, I stamped and colored him with markers in the traditional way, then since I wanted him to resemble my son, so I gave him a haircut.
Since I wanted him to have a right hand, I removed his right arm.
Then I stamped him again,


 I stamped his left arm again, cut it out, 


flipped it over, and inked around the edge with a black marker.


Then - VOILA!  He now has a hand on his right arm.


I used my craft knife to cut around his fingers on his left hand, freeing it to hold his guitar.
I love his ruggedly handsome looks! 
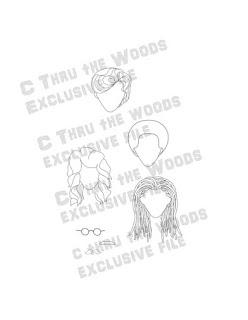
These stamps work so well!  The ink takes to the paper well and I get great stamped images.
Thinking outside the box a little allows you to modify them in different ways.
Jeremiah has become Batman, Spiderman and now my son.
All of your stamps can become someone else with a little imagination and costume changes.

Thursday, August 27, 2015

Drake the Vampire

Wow, how summertime flies by! I hardly have had a chance to even go into my craft room! Can anyone else empathize with me?  Since I haven't had much of a chance to sit down and play, I thought that I would talk about one of my favorite days that is slowly approaching. Yes, I LOVE Halloween. It has always been fun for me to make my costume every year!!  Now that school is in session it is time for me to get my thinking hat on and come up with an idea. So with that in mind, I decided to pull out my old Dracula tag for some inspiration. 


For this tag I used Drake. I colored the image with Spectrum Noir markers and left his face white.  I chose the fang stamp to add a little touch to the costume.  I just had to have the "drippy goo" punch when it came out years ago and I thought it was perfect for this tag.  I chose a piece of black paper that had a red core. I used a bunch of sandpaper to rough up the tag to give it a distressed look. I didn't like how shiny the red satin ribbon was, so I used some black ink to also distress it.  I made the rosette flowers because I always love to add some fancy touches to all boy themed projects!

Thanks for checking out our projects!! 

Drake can be purchased at the tic tail store.

Wednesday, August 19, 2015

Cutting the Cake


Hello all!

I was looking through the current challenges out
in blog land and ran across one that had a photo as inspiration and
 knew I had to take out Alex along with  Lorrena from Julie Nutting
and create a wedding card.


This is the photo that inspired me.

I stamped both dolls on white card stock, colored with
Spectrum Noir markers and, of course, fussy cut.
I dry embossed Lorrena's skirt and added stickles to her
bodice, flounce and headband.
I created the background with paper from the Paper Studio's 
Kirby Teesdake Studio paper pack and a die cut gate cut
from the Cricut Ornamental Iron cartridge.
I created a cake table with vellum and netting.
The cake and bouquet are colored images from
Deedee's Digis Now and Forever set.

So what do you think?
I love the way it all came out!

Until next time…
Happy Crafting!

Sunday, August 16, 2015

Drake Is Ready For A Bite!


Donna here with Drake!
Drake has been tired of hanging out in his closet, and is ready to prowl!


Drake was cut in several sections to have a layered look
1) black back section
2) White section for face, neck and hand
3) Purple section for shirt
4) black front for cape


His face is lightly accented with purple in cheeks and neck. His eyes are accented with gray.
He has red eyes in true vampire fashion.
His mouth was made using the stamp included.


Drake is one of my favs! 
He has a phantom mask, scary mask and he makes a great Elvis.
I have another use planned for him next week!
Please leave a comment below and let me know what
kind of project you would use Drake for?

Sunday, August 9, 2015

A Salty Pirate


 Hello! Donna back again with a mixed media canvas using the new pirate stamp.

I began by using painter's tape to divide the canvas. Then sprayed the top half with Tim Holtz "Salty Ocean" and the bottom half with "Mermaid Lagoon".

I painted "land" with brown acrylic paint. Then some white acrylic paint was swirled along the "coast" and in the water.

 The pirate's ship was cut from BoBunny paper and SS Treasure was stamped in white ink. The pirate was stamped on several papers, cut out and pieced onto the canvas like a puzzle. This was repeated with the mermaid. I used Mod Podge to adhere them to the canvas. The sea creatures are resin and were painted with acrylic paint. The bottle contains a message for help. Several chipboard findings were also added. The "seaweed" are from artificial plants. The swirls in the ocean were made with clear stickles.

The winner from last week is Laura Cushman, thank you to everyone who stopped by. Laura, if you will send me your address via Facebook, I'll send some goodies your way.

Wednesday, August 5, 2015

Party With Alex


Hi! It's Judy here sharing a card I createdusing the Alex stamp.
I paired him up with one of the Julie Nutting dolls, Cassandra.


I thought Alex would work great with this pretty girl
for a fancy party theme.

I stamped both on white card stock and colored with 
a combination of markers and pencil colors. 
The girl's dress was paper pieced with a metallic paper.
The background DP is from DCWV.
I stamped the balloons and party sign and embossed.

Be sure and visit
http://cthruthewoodsclearstamps.tictail.com
and check out all the stamps and digital files available.

Until next time…
Happy Crafting

Wednesday, July 29, 2015

Jack the Pirate

Happy Wednesday everyone!
Judy here with a card I created with the newest
C Thru the Woods clear stamp!

This is Jack!
Love this guy. I think you will too!


I used my Spectrum Noir markers to color Jack,
the pirate ship and background.  I also used
the markers on the treasure chest along with some gel pens.
I fussy cut Jack and the treasure chest before adding to the background.
I had great fun creating this and the mind is going
"90 to nothing" thinking about what else I can do with this stamp
and all the accessories included in the set.


You need to check this stamp set out at
along with all the other great guy stamps available.

Until next time…
Happy Crafting!


Sunday, July 26, 2015

Stan Is Fanning The Flames Of Love


      Donna here today with Stan The Fireman to help me wish my husband a Happy Anniversary. 
 I stamped Stan and his hat on vanilla cardstock and used my trusty Stampin'Up markers to color him in.  Then I added some Karen Foster embellishments to help me "get my message across"...

Of course Stan comes with his own work tools
and he is available in acrylic here:
Or an additional accesory digital file here:
So glad that Stan (and Charlene) helped me come up with this idea!  
Please leave a comment and how to contact you and
next Sunday I'll announce a winner for a little Happy Mail!


Wednesday, July 22, 2015

Fun in the Sun

Happy Wednesday!
Judy here with a quick post to share a tag made with
some of Charlene's digital files.


This is Joe! 

There are 3 coordinating files that were used.


I colored Joe, the swim trunks and hair with Spectrum Noir
markers, fussy cut and pieced together.
I coverers the tag with tan card stock to mimic sand.
I have a water print paper for the middle of the tag and the top
was done with white card stock which I embossed with
a cloud embossing folder and inked with blue ink.
My sun  is just a yellow die cut circle and I inked the edge with orange ink.
I found the palm tree and surf board image on the internet, 
printed and fussy cut. I added some shell, sunglass and sun tan lotion
stickers. The sentiment was done with letter stickers.

Be sure and check out these digital files, along with the 
others and clear stamps Charlene has to offer at

Thanks so much for stopping by and
Happy Crafting!