Wednesday, July 22, 2015

Fun in the Sun

Happy Wednesday!
Judy here with a quick post to share a tag made with
some of Charlene's digital files.


This is Joe! 

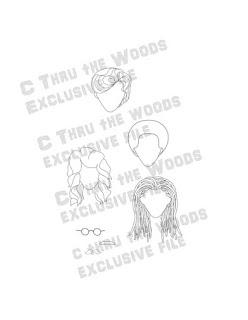
There are 3 coordinating files that were used.
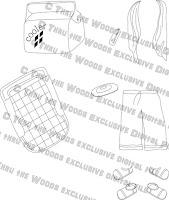

I colored Joe, the swim trunks and hair with Spectrum Noir
markers, fussy cut and pieced together.
I coverers the tag with tan card stock to mimic sand.
I have a water print paper for the middle of the tag and the top
was done with white card stock which I embossed with
a cloud embossing folder and inked with blue ink.
My sun  is just a yellow die cut circle and I inked the edge with orange ink.
I found the palm tree and surf board image on the internet, 
printed and fussy cut. I added some shell, sunglass and sun tan lotion
stickers. The sentiment was done with letter stickers.

Be sure and check out these digital files, along with the 
others and clear stamps Charlene has to offer at

Thanks so much for stopping by and
Happy Crafting!


Tuesday, July 21, 2015

James the Police Officer Canvas by Holly Ann Bray Designs

James the Police Officer Canvas

by Holly Ann Bray Designs

http://cthruthewoodsclearstamps.tictail.com/product/james-digital-file


I wanted to try something new so I chose a Make Market Burlap Panel from 
Michael's to highlight Charlene Wood's clear acrylic stamp, James the Police Officer. 
I went with a masculine paper by Ken Oliver called Studio Brass Keys feeling the 
colors worked well with the burlap panel and the navy of James' uniform. 
I attached the paper and ribbon with spray adhesive. I hand-stamped the James accessories 
on Stampin' Up Canvas Ribbon with a Black Staz On inkpad.  Next, I stamped James on 
Copic suitable paper and proceeded to use Copic Markers to color his face, hand and 
belt. I stamped and fussy cut his shoes, cap, badges and uniform. To complete James,
I made a tag utilizing the Love My Police Officer stamp. 


Monday, July 20, 2015

Mystical Angel by Angelica Soh

Happy Monday Crafties!
Did I not say I Love Butterflies and Angels!
Well here is my Butterfly Angel
I call it "Mystical Angel"

The picture shows better on a computer or landscape view on your phone.


I super love and enjoyed every moment in making this as I LOVE wings, butterflies and angels. 

Here are the instructions:
1) Size and Print out these beautiful wings designed and available in digital form by Charlene could be found here
2) I used 4 Stampin Up Marker and in this one I used 3 different shades of pink and 1 shade of turquoise.
3) After drawing in and outlining the wings and dress area of the digital. I fussy cut each one out.
4) Align them as shown in the picture and glue then together.
5) For finishing touch I added a resin Angel by Prima Marketing.

This is great as an embellishment for pretty much anything crafty like scrapbooking or even as a home decor charm. Make many of these and it will surely brighten up your project or room. 

-------------- Thank You and Hope I could Inspire you one way or another. Cheers, Angelica --------------


Sunday, July 19, 2015

Have A Boot Scootin' Good Time


Cowboy Dan is heading to Nashville to wish my son a happy birthday!

Dan was stamped on vanilla Cardstock and I colored his hair with Spectrum Noir markers ( TN 7-8 ). Then I stamped him on his shirt, pant and bandana papers.  I used 2 tones of brown for his boots, belt, gloves and hat.  After fussy cutting his accessories out, everything was glued together. Scor-Tape was used for the glove as a more aggressive adhesive, to hold the "rope".  The bakers twine was dampened with Collage Pauge instant decoupage in matte variety.  This allowed it to hold it's shape better. A dot of the Collage Pauge was used several places on the card to adhere it to the paper.

The card measures 6X10. A little large but I love it, pretty sure he will too!

Thursday, July 16, 2015

Camo by Rosie Posie

Hello again! It is my turn to blog today and I thought I would show you what I had the pleasure of working on at a crop over the weekend.  Once I saw Mark and knew I needed to make my own soldier.  I'm sure I am not the only one that has had "the perfect paper" for your project. I know I bought a bunch of camo print paper, but for the life of me I could not find it! So what is a gal to do? COLOR!  I stamped Mark and decided to bust out my Spectrum Noir markers and use some of my best friend's copics to color!  I started out with the darker shades of green and made small little patches all over the uniform.  Then I used some medium greens and finished of by blending with the lighter greens.  Turns out I LOVED making my own green camo! I just might have to try a brown and grey version. What do you all think?


Thanks for stopping by and of course Mark is available here:
http://cthruthewoodsclearstamps.tictail.com/products

Wednesday, July 15, 2015

Blessings

Hi! It's Judy here.
Today I have a card I created using one of Charlene's digital files.

This one is called "Wings"


I love this digital file!
It was printed at half size so I could fit it on a 5 x 6 1/2" card.
Using a gold gel pen I outlined the entire image
and then colored in with glitter gel pens.
I used some gold glitter card stock and purple
metallic card stock. The greeting is a Dazzles sticker 
and I finished off with some purple gems.

You can find this digital file at
cthruthewoodsclearstamps.ticktail.com.
I hope you check out all the digital files
and clear stamps available there.

Until next time…
Happy Crafting!


Sunday, July 12, 2015

Timmy Enjoying Summer Vacation


Little Timmy is enjoying his summer vacation. He has been fishing today but he is also full of ideas for the rest of the summer. His little bare toes are perfect for all those fun outdoor things that boys love to do. The knees of his pants are distressed to show the skin underneath.


Drawing faces can be a scary thought. I suggest stamping the heads of your boys multiple times and practicing. If you make a mistake on a completed boy's head, simply "surgically" remove his head and replace it. (Don't we all wish it was that easy in real life?)


Hoping you are enjoying your summer as much as Timmy.

Thursday, July 9, 2015

Guest Designer-Julie Vincent Designs!

Good morning!!
We have a guest designer for the blog today.
Julie Vincent is a very important part of C Thru the Woods Clear Stamps!
She is my sounding board for stamp ideas but more importantly, she helps review the stamps before I send them to manufacture!  Julie has been crafting with doll stamps for quite a while and has some gorgeous designs completed with the girls.  So, when she found the Boys in the Woods series, she was hooked!  Her expertise helps me to tweak designs to make them more appealing to crafters.   You will often find Julie helping other crafters, rather than completing her own projects!!  That is why I was thrilled to get two projects from her for posting on the blog!!!

For this patriotic tag, Julie dressed Charlie in a star-striped vest and dark blue pants.  I just love the red sparkling shoes on the girl doll!!  Both the vest and her dress are in the same color, tying the design together and giving it a cohesive design.  Her background, with the flags, leaves you finishing the sentiment:  Proud to be....An American!!  Love it!!

For this tag, Julie found the perfect camouflage paper for Mark's uniform.  The background for the tag is a closeup of a flag and gives this tag its touching mood.  Some Gave All, in memory of all our American Heroes.  This simple tag truly shows how proud we are of all our military men and the sacrifices they make for us!!

Thank, Julie Vincent, for being our guest designer on the blog today!! 

Wednesday, July 8, 2015

Michael

Hi there! It's Judy here to share another card with you.
I made this one a while back and have yet to share it.

This one uses the "Michael" stamp.


I stamped Michael on white card stock, colored with pencil colors and fussy cut.
Two coordinated DP rectangles were added to the red card base. I added an embossed
 die cut circle on top of the larger rectangle. Michael was added on top of the
die cut with foam dots. I added the music stand and trumpet stickers.
The finishing touches were the stamped and die cut sentiment and music notes.

All of Charlene's stamps work so well in a multitude of different themes.
You just have to let your imagination go!

Check them out at
http://cthruthewoodsclearstamps.tictail.com.

Until next time Happy Crafting!


Sunday, July 5, 2015

Mark Takes Some R&RThis project is a 6 x 6 cardThis project is a 6 x 6 card


Good Morning!  Hope all of you had a happy and safe Fourth of July.  Donna here to share my most recent project.
Mark decided to celebrate the July Fourth weekend with some R and R. He headed out to Bo Bunny to spend some time with Penny Emporium! After spending a few days with her, he looks like a whole new man! Penny gave him the top hat, and I made his shirt without all of his enlisted man's patches.
One of the things I really love about the stamps, is that you can use all or part of them, to make what ever you can dream of.  This project is a 6X6 card. To make his shirt without the patches, I simply made a pattern and cut out the unmarked shirt, then carefully drew in the collar details. My biggest problem now is letting go of my projects! I love them all and almost feel like they are my children!

Wednesday, July 1, 2015

Love My Police Officer


Hello everyone!
It's Judy here again and today I have a card
I created using the "James" stamp.


My husband has worked in the law enforcement field
for 28 years, so when Charlene came out with this stamp
I knew I would enjoy using it on many projects.

I stamped James on white card stock, colored with
Spectrum Noir markers and fussy cut before popping
him with foam tape on top of the oval die cuts.
The sentiment is part of the stamp set.
The police themed die cuts were cut with Cheery Lynn Designs dies.
The DP is from DCWV's classic prints and card stock mat stack.

Hope you'll check out the James stamp and all the others available at
http://cthruthewoodsclearstamps.tictail.com

Until next week, happy crafting!
Monday, June 29, 2015

Congratulations by Angelica Soh


Happy Monday Crafties!
Congratulations card is here with Cowboy Dan!
Yee haw ...
Here he is ... 

The picture shows better on a computer or landscape view on your phone.


This card is easy peezy, hope you'll enjoy this card as much as I had fun making it.

1) I cut Whisper White Coordinate 12 x 12 cardstock into 8 1/2 x 5 1/2" and scored in the middle 4 1/4 from 8 1/2 2) I cut a red cardstock into 4 x 5 1/4" and double sided taped it and center it onto the white cardstock
3) So this digital is sized perfectly to fit the card, which I've colored and slight modification on the hair, the shirt from a short sleeve t-shirt to a buttoned up short sleeve collar shirt, added a back pocket and a half side bandanna.
4)Then I cut a dark navy blue cardstock almost 2/3 of the red cardstock, and splatter some watered down acrylic paint on the entire cardstock. It is then adhered to the red cardstock.
5) I took out my Versamark and use a small sponge and randomly dab the versamark randomly on the dark navy blue cardstock and the top 2/3 of the page. Then used my holographic embossing powder on the versamarked areas, then it was later heat embossed to give it some glitter.
6) I used one of Stampin Up's tree stamp and versamark them and stamped the image on and add white embossing powder, was then heat embossed.
7) Then I added the fences, then I used my navy blue ribbon and placed it at the bottom of the red carstock.
8) I cut a small white stripe of paper, place and adhered it between the bottom of the fence, and the top of the ribbon.
9) Then I cut another stripe of navy cardstock and stamped it with the sentiment Congratulations, it was later pop dotted, then placed on the card
10) Later I took some gold stars and place them randomly across the entire top of the card, as well as before and after the sentiment Congratulations.

You may find the beautiful digital and stamps here. 


Sunday, June 28, 2015

Uncle Sam and Sammy Tags

                                                     Introducing Uncle Sam and Sammy!


These tags were made using Alex and the Simple Stories' Stars & Stripes Collection.
I am a NUT for paper piecing with these stamps!
It is sooooo easy!  If you have never paper pieced then here is a quick "How To".

     Stamp Alex on vanilla cardstock, and then stamp on your papers for clothing selection.
 I used a stripe for the jackets, red for the pants, white for the shirts,and stars for the cumberbunds.  The shoes are colored in for both.  Sammy's hair was colored in, Sam's hair was paper pieced.  The hats were by Jolee. On the vanilla cardstock stamped image, I trim all the areas with clothing a little small by trimming just inside the stamped area.  In the patterned paper, I trim just outside the stamped area.  When placing clothing, apply it just like you would get dressed.  For example, shirt first, then pants, cumberbund and jacket.  This way the pieces can overlap slightly. I always cut all the parts out and then put them together.

 To add a little more dimension, the sleeve on Sam's jacket is cut separately, with the stripes heading in a different direction from the rest of the jacket. 


I prefer most of my dolls without faces, that is a matter of personal preference of course.  If you want faces, stamp multiple heads and practice.  Sam looked pretty silly with a beard and eyebrows but no face...


Using Pop-dots is a fun way to add dimension.  Keep in mind that it adds bulk to your albums, and if you are mailing the tag, you might want to use a padded envelope.
I hope everyone has a safe 4th of July holiday.

Thursday, June 25, 2015

Soccer Father's Day Card by Rosie Posie


Hello, and welcome back!! My husband absolutely LOVED his present and his card!

I knew I needed to use Joe the second I decided to make a soccer player card.  He is the perfect image to make into ANYTHING! Well, I knew I couldn't replicate a Manchester City jersey, so I went to the internet. I eyeballed this and shrunk it down to fit.  I then had to have shorts, so the second image was specifically for the shorts.  I fussy cut all three images out to make sure that they fit and so I could decide which jersey image I liked the best.


Next,  it was time to color Joe.  When coloring the body, I always color outside of the lines. I like the way that they blend better so I am always coloring one for the base and then stamping another image to cut out and glue on.  With Joe, I was going to cover his body so I didn't worry about coloring his torso completely.  I use Spectum Noir markers and after a lot of practice I am able to blend them nicely.  Again, I had to fussy cut him out.  Since I needed his arms available for holding something, I cut out the hands so they were not attached to his torso.  I did not detail cut out the toes because I try to wait for the end so they don't get squished, damaged or messed up on accident. (I usually wait to cut out the fingers and hands as well, but needed to dress Joe differently this time.)


Here I go playing with the body parts again!!  My husband isn't bald and the hair styles with Joe just don't quite match hubby.  But Andrew's head is perfect!  I stamped Andrew's head using my MISTI to make sure I conserve my scraps.  Then I color just his head and cut it out.  Simply glue on Andrew's head to Joe's body and viola! A perfect hubby!


Now for the finished card!  I used a honeycomb embossing folder and embossed the background. I colored in the hexagons that resembled a soccer ball pattern with my black markers.  I liked the shirt tucked into the shorts and it fit perfectly!!  I stamped a soccer ball,  which I cut out and positioned it in Joe's hands.  Now is the time where I fussy cut the feet.  I also used my scissors to make grass for hubby to stand on.  My daughter picked out the stickers to spell DAD in Manchester City colors.  I used some flag dies to cut out some flags and had the kids sign the banners.  Finished up with a "Happy Father's Day" sentiment and I am amazed at the results!  Thanks of looking and of course Joe and Andrew are available in the tic tail store!  http://cthruthewoodsclearstamps.tictail.com/products


Wednesday, June 24, 2015

Super Hero Charlie

Hey everyone! It's Judy here again with a new card
I made using the large Charlie stamp and one of 
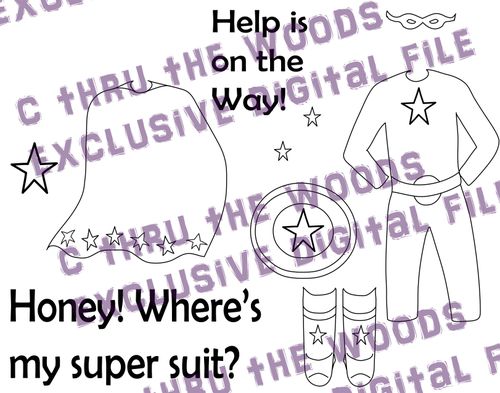
the new digital files Charlene created to turn
him into a Super Hero, 
Charlie's Super Suit.


We all have a Super Hero in our lives, right?
I know I do. It's my husband.
He does so much for and cares so for our family
that he never even stops to think before his
"Help is on the Way"!
That's just the way he is.

Anyway, I had a lot of fun creating this card. It started out as a tag
but I felt it needed something else so I added the tag to a
5 1/2 x 8 1/2" card base that was simply created by folding
an 8 1/2 x 11" piece of card stock in half.
I added some DCWV DP and placed the tag on top.
All the stars were cut with an old Sizzix originals die, except
for the smallest ones. Those were punched with a Marvy punch.
Charlie's Super suit was colored with Spectrum Noir markers.

Hope you like him and this inspires you to check out
all the C Thru the Woods products at

Until next week, happy crafting!